Spring MVC provides easy way to upload files, it may be image or other files. Let's see a simple example to upload file using Spring MVC.
Required Jar files
To run this example, you need to load:
- Spring Core jar files
- Spring Web jar files
- commons-fileupload.jar and commons-io.jar file
1) Download all the jar files for spring including core, web, aop, mvc, j2ee, remoting, oxm, jdbc, orm etc.
Download commons-io.jar
3) Download commons-fileupload.jar
Spring MVC File Upload Steps (Extra than MVC)
1) Add commons-io and fileupload.jar files
2) Add entry of CommonsMultipartResolver in spring-servlet.xml
- <bean id="multipartResolver"
- class="org.springframework.web.multipart.commons.CommonsMultipartResolver"/>
3) Create form to submit file. Method name must be "post" and enctype "multiple/form-data".
- <form action="savefile" method="post" enctype="multipart/form-data">
- Select File: <input type="file" name="file"/>
- <input type="submit" value="Upload File"/>
- </form>
4) Use CommonsMultipartFile class in Controller.
- @RequestMapping(value="/savefile",method=RequestMethod.POST)
- public ModelAndView upload(@RequestParam CommonsMultipartFile file,HttpSession session){
- String path=session.getServletContext().getRealPath("/");
- String filename=file.getOriginalFilename();
-
- System.out.println(path+" "+filename);
- try{
- byte barr[]=file.getBytes();
-
- BufferedOutputStream bout=new BufferedOutputStream(
- new FileOutputStream(path+"/"+filename));
- bout.write(barr);
- bout.flush();
- bout.close();
-
- }catch(Exception e){System.out.println(e);}
- return new ModelAndView("upload-success","filename",path+"/"+filename);
- }
5) Display image in JSP.
- <h1>Upload Success</h1>
- <img src="${filename}"/>
Spring MVC File Upload Example
Create images directory
Create "images" directory in your project because we are writing the code to save all the files inside "/images" directory.
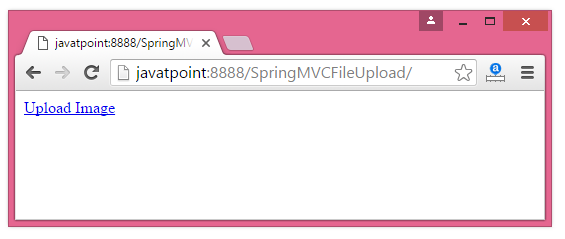
index.jsp
- <a href="uploadform">Upload Image</a>
Emp.java
- package com.javatpoint;
- import java.io.BufferedOutputStream;
- import java.io.File;
- import java.io.FileOutputStream;
- import javax.servlet.ServletContext;
- import javax.servlet.http.HttpServletRequest;
- import javax.servlet.http.HttpServletResponse;
- import javax.servlet.http.HttpSession;
- import org.apache.commons.fileupload.disk.DiskFileItemFactory;
- import org.apache.commons.fileupload.servlet.ServletFileUpload;
- import org.springframework.stereotype.Controller;
- import org.springframework.web.bind.annotation.ModelAttribute;
- import org.springframework.web.bind.annotation.RequestMapping;
- import org.springframework.web.bind.annotation.RequestMethod;
- import org.springframework.web.bind.annotation.RequestParam;
- import org.springframework.web.multipart.commons.CommonsMultipartFile;
- import org.springframework.web.servlet.ModelAndView;
-
- @Controller
- public class HelloController {
- private static final String UPLOAD_DIRECTORY ="/images";
-
- @RequestMapping("uploadform")
- public ModelAndView uploadForm(){
- return new ModelAndView("uploadform");
- }
-
- @RequestMapping(value="savefile",method=RequestMethod.POST)
- public ModelAndView saveimage( @RequestParam CommonsMultipartFile file,
- HttpSession session) throws Exception{
-
- ServletContext context = session.getServletContext();
- String path = context.getRealPath(UPLOAD_DIRECTORY);
- String filename = file.getOriginalFilename();
-
- System.out.println(path+" "+filename);
-
- byte[] bytes = file.getBytes();
- BufferedOutputStream stream =new BufferedOutputStream(new FileOutputStream(
- new File(path + File.separator + filename)));
- stream.write(bytes);
- stream.flush();
- stream.close();
-
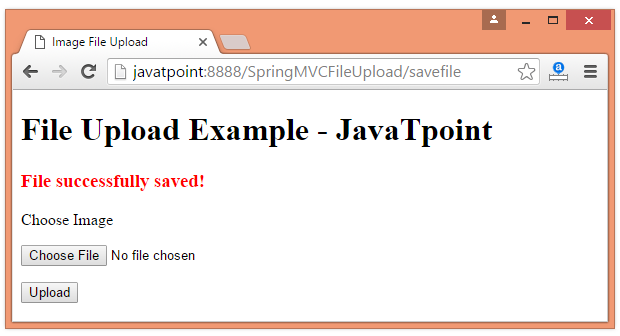
- return new ModelAndView("uploadform","filesuccess","File successfully saved!");
- }
- }
web.xml
- <?xml version="1.0" encoding="UTF-8"?>
- <web-app version="2.5"
- xmlns="http://java.sun.com/xml/ns/javaee"
- xmlns:xsi="http://www.w3.org/2001/XMLSchema-instance"
- xsi:schemaLocation="http:
- http:
- <servlet>
- <servlet-name>spring</servlet-name>
- <servlet-class>org.springframework.web.servlet.DispatcherServlet</servlet-class>
- <load-on-startup>1</load-on-startup>
- </servlet>
- <servlet-mapping>
- <servlet-name>spring</servlet-name>
- <url-pattern>/</url-pattern>
- </servlet-mapping>
- </web-app>
spring-servlet.xml
Here, you need to create a bean for CommonsMultipartResolver.
- <?xml version="1.0" encoding="UTF-8"?>
- <beans xmlns="http://www.springframework.org/schema/beans"
- xmlns:xsi="http://www.w3.org/2001/XMLSchema-instance"
- xmlns:p="http://www.springframework.org/schema/p"
- xmlns:context="http://www.springframework.org/schema/context"
- xsi:schemaLocation="http:
- http:
- http:
- http:
-
- <context:component-scan base-package="com.javatpoint"></context:component-scan>
-
- <bean class="org.springframework.web.servlet.view.InternalResourceViewResolver">
- <property name="prefix" value="/WEB-INF/jsp/"></property>
- <property name="suffix" value=".jsp"></property>
- </bean>
-
- <bean id="multipartResolver"
- class="org.springframework.web.multipart.commons.CommonsMultipartResolver"/>
-
- </beans>
uploadform.jsp
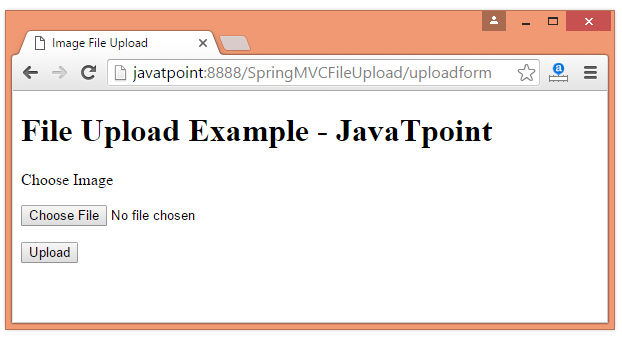
Here form must be method="post" and enctype="multipart/form-data".
- <%@taglib uri="http://www.springframework.org/tags/form" prefix="form"%>
-
- <!DOCTYPE html>
- <html>
- <head>
- <title>Image File Upload</title>
- </head>
- <body>
- <h1>File Upload Example - JavaTpoint</h1>
-
- <h3 style="color:red">${filesuccess}</h3>
- <form:form method="post" action="savefile" enctype="multipart/form-data">
- <p><label for="image">Choose Image</label></p>
- <p><input name="file" id="fileToUpload" type="file" /></p>
- <p><input type="submit" value="Upload"></p>
- </form:form>
- </body>
- </html>
Output
Go to the path printed on the server console, to see the uploaded file.
Download Spring MVC File Upload Example
We have created this application in MyEclipse IDE which already provides the jar files. If you use eclipse or other IDE's, you need to load the jar file for spring MVC.


No comments:
Post a Comment