In android, Localization is a process to change the string into multiple languages based on our requirements.
Android is a most popular mobile operating system and it run on millions of devices in many regions. So if we implement an android app which is localized for all the regions, then it will reach the most of users.
While implementing a localization in our android app, we need handle text, audio files, numbers, currency and graphics in way which is appropriate for the locales where our application is used.
Here we are going to build an application that supports a localization of strings in multiple languages, such as Telugu, Hindi and Japanese.
Android Localization of Strings
Generally, android consider English is a default language and it loads the string resources from /res/values/strings.xml. In case, if we want to add a support for other languages, we need to create a values folder by appending the Hyphen and ISO language code.
For example, if we want to add support for Japanese, then we need to create a values folder named values-ja under res folder and add a strings.xml file in it with all the strings that needs to translate into Japanese Language.
Following is the example of defining a multiple values folder in /res directory to support localization of strings in multiple languages such as Telugu, Hindi and Japanese.

Once we create a required files and change the device language through Settings à Language & Input à Select Language (Japanese), android OS will check for the appropriate language resources available in the app.
In case, if the app supports a selected language, then android will look for the string resources in values-(ISO language code) folder of the project. For example, the selected language is Japanese, then it will load the string values from values-ja/strings.xml file.
If any string value missing from supported language (strings.xml) file, then android will load the missing strings from default strings.xml file i.e. values/strings.xml.
While implementing an android app which supports a multiple languages, always consider to load the string values from strings.xml file otherwise the language translation will become difficult.
Now we will see how to create an application that supports a localization of strings in multiple languages, such as Telugu, Hindi and Japanese in android with example
Android Localization Example
Following is the example of building an app that supports a localization of strings in multiple languages in android.
Create a new android application using android studio and give names as LocalizationExample. In case if you are not aware of creating an app in android studio check this article Android Hello World App.
Now open activity_main.xml file from \res\layout folder path and write the code like as shown below.
activity_main.xml
<?xml version="1.0" encoding="utf-8"?><LinearLayout xmlns:android="http://schemas.android.com/apk/res/android"
android:orientation="vertical" android:layout_width="match_parent"
android:layout_height="match_parent">
<TextView
android:id="@+id/textview1"
android:layout_width="wrap_content"
android:layout_height="wrap_content"
android:layout_marginTop="100dp"
android:layout_gravity="center"
android:textColor="#F1511B"
android:textSize="30dp"
android:textStyle="bold"
android:text="@string/hello"/>
<TextView
android:id="@+id/textview2"
android:layout_width="wrap_content"
android:layout_height="wrap_content"
android:layout_marginTop="30dp"
android:layout_gravity="center"
android:textColor="#80CC28"
android:textSize="30dp"
android:textStyle="bold"
android:text="@string/tutlane"/>
<TextView
android:id="@+id/textview3"
android:layout_width="wrap_content"
android:layout_height="wrap_content"
android:layout_marginTop="30dp"
android:layout_gravity="center"
android:textColor="#80CC28"
android:textSize="30dp"
android:textStyle="bold"
android:text="@string/android"/>
<TextView
android:id="@+id/textview4"
android:layout_width="wrap_content"
android:layout_height="wrap_content"
android:layout_marginTop="20dp"
android:layout_gravity="center"
android:textSize="30dp"
android:textStyle="bold"
android:text="@string/reigster"/>
</LinearLayout>
Now open your strings.xml that is located under \res\values path and write the code like as shown below.
values/strings.xml
<resources>
<string name="app_name">Localization Example</string>
<string name="hello">Hello World</string>
<string name="tutlane">Tutlane</string>
<string name="android">Android Tutorial</string>
<string name="reigster">Register</string>
</resources>
<string name="app_name">Localization Example</string>
<string name="hello">Hello World</string>
<string name="tutlane">Tutlane</string>
<string name="android">Android Tutorial</string>
<string name="reigster">Register</string>
</resources>
As discussed, we are building an app to support multiple languages, such as Telugu, Hindi and Japanese so we need to create values-te, values-hi and values-ja folders under res folder and add strings.xml file in each folder like as shown below.
Now open strings.xml file from each folder and write the code like as shown below.
values-hi/strings.xml
<?xml version="1.0" encoding="utf-8"?><resources>
<string name="app_name">स्थानीयकरणउदाहरण</string>
<string name="hello">नमस्तेदुनिया</string>
<string name="tutlane">ट्यूटोरियलगली</string>
<string name="android">एंड्रॉयडट्यूटोरियल</string>
<string name="reigster">रजिस्टर</string>
</resources>
<string name="app_name">स्थानीयकरणउदाहरण</string>
<string name="hello">नमस्तेदुनिया</string>
<string name="tutlane">ट्यूटोरियलगली</string>
<string name="android">एंड्रॉयडट्यूटोरियल</string>
<string name="reigster">रजिस्टर</string>
</resources>
values-te/strings.xml
<?xml version="1.0" encoding="utf-8"?><resources>
<string name="app_name">స్థానికీకరణఉదాహరణ</string>
<string name="hello">హలోవరల్డ్</string>
<string name="tutlane">ట్యుటోరియల్వీధి</string>
<string name="android">ఆండ్రాయిడ్ట్యుటోరియల్</string>
<string name="reigster">నమోదు</string>
</resources>
<string name="app_name">స్థానికీకరణఉదాహరణ</string>
<string name="hello">హలోవరల్డ్</string>
<string name="tutlane">ట్యుటోరియల్వీధి</string>
<string name="android">ఆండ్రాయిడ్ట్యుటోరియల్</string>
<string name="reigster">నమోదు</string>
</resources>
values-ja/strings.xml
<?xml version="1.0" encoding="utf-8"?><resources>
<string name="app_name">ローカリゼーション例</string>
<string name="hello">こんにちは世界</string>
<string name="tutlane">ツタン</string>
<string name="android">アンドロイドチュートリアル</string>
<string name="reigster">登録</string>
</resources>
<string name="app_name">ローカリゼーション例</string>
<string name="hello">こんにちは世界</string>
<string name="tutlane">ツタン</string>
<string name="android">アンドロイドチュートリアル</string>
<string name="reigster">登録</string>
</resources>
Now open your main activity file MainActivity.java from \java\com.tutlane.localizationexample path and write the code like as shown below
MainActivity.java
package com.tutlane.localizationexample;import android.support.v7.app.AppCompatActivity;import android.os.Bundle;
public class MainActivity extends AppCompatActivity {
@Override
protected void onCreate(Bundle savedInstanceState) {
super.onCreate(savedInstanceState);
setContentView(R.layout.activity_main);
}
}
public class MainActivity extends AppCompatActivity {
@Override
protected void onCreate(Bundle savedInstanceState) {
super.onCreate(savedInstanceState);
setContentView(R.layout.activity_main);
}
}
Output of Android Localization Example
When we run above program in android studio we will get the result like as shown below.
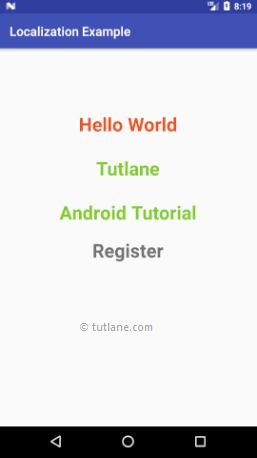
If you observe above result, by default the app showing in English because the device language is English.
Now we will change the device language, for that go to Settings à Language & Input à Select Telugu. Our app will show the details in Telugu like as shown below.

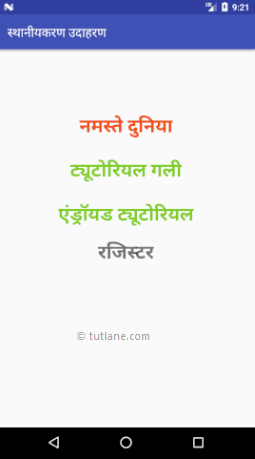
Again change the device language to Hindi, our app will show the details in Hindi like as shown below.
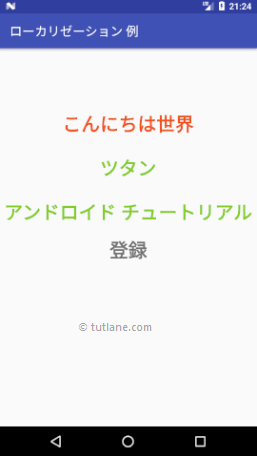
Now we will change the device language to Japanese, Our app will show the details in Japanese like as shown below.
This is how we can implement multi language or localization app in android to support multiple languages based on our requirements.


No comments:
Post a Comment